

Creating a seamless and natural look with a lace front wig involves a process known as “melting” the lace. This technique ensures the lace front of the wig blends flawlessly with your skin, making the hairline almost undetectable and giving the illusion that the wig hair is growing directly from your scalp. This article will guide you through the process step-by-step, ensuring you achieve that sought-after, natural-looking hairline.
Lace Melting.
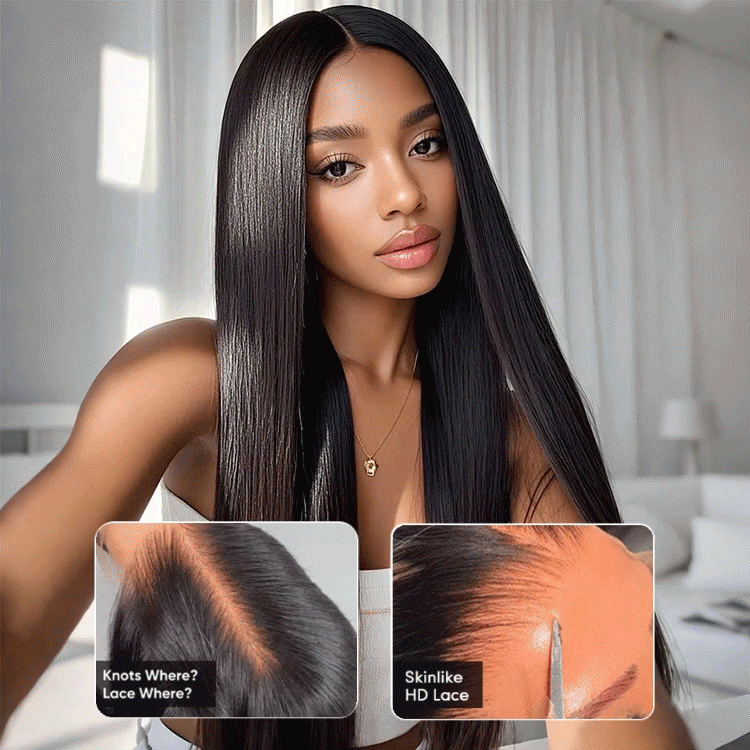
Melting the lace refers to the process of making the lace front of a wig blend in with your skin so seamlessly that it’s virtually invisible. This technique is essential for anyone looking to achieve a natural look with their wig, whether for daily wear or special occasions.
Tools and Materials Needed.
Before we dive into the steps, let’s look at the tools and materials you’ll need:
A high-quality lace front wig
Wig cap (preferably in a shade close to your skin tone)
Rat tail comb
Scissors (small and sharp for precision)
Tweezers
Hair clips or ties
Wig adhesive (waterproof options are available)
Adhesive remover
Makeup (foundation or concealer matching your skin tone)
A makeup brush or sponge
Blow dryer (with a cool setting)
Silk scarf or elastic band.

Step 1: Prepare Your Natural Hair.
For the most natural look, you need to ensure your own hair is as flat as possible under the wig. Braid your hair in cornrows, slick it back into a tight bun, or wrap it, depending on your hair length and texture. The goal is a smooth, flat surface.
Step 2: Wear a Wig Cap.
Place a wig cap over your hair, adjusting it to cover all your hair and fit snugly against your skin. If the wig cap doesn’t match your skin tone, you can apply foundation or concealer to make it blend better.
Step 3: Prepare the Wig.
Before you put on the wig, make adjustments to the lace and hairline as necessary:
Trim the lace: Leave about a millimeter of lace beyond the hairline of the wig. This allows for a more natural blend and provides a small margin to prevent accidental over-trimming.
Tweeze the hairline: To mimic a natural hair density, tweeze the hairs along the hairline of the wig. Be cautious and gradual; over-tweezing can lead to bald spots.
Step 4: Test the Fit of the Wig.
Before applying any adhesive, place the wig on your head to check the fit. Adjust the straps inside the wig to ensure it’s snug but comfortable. The lace should sit on your forehead, just before your natural hairline.
Step 5: Apply Adhesive.
Once you’re happy with the fit, lift the front of the wig and begin to apply your chosen adhesive along your hairline, where the lace will sit. You can use a brush or a small applicator to ensure an even application. Wait for the adhesive to become tacky (follow the product’s instructions for exact timing).
Step 6: Secure the Wig.
Carefully place the wig back on your head, aligning the lace with your adhesive-applied hairline. Press down gently along the edges to secure the lace into the adhesive. Use a rat tail comb to press down any stubborn areas.
Step 7: Melting the Lace.
To truly melt the lace into your skin, follow these steps:
Apply a thin layer of foundation or concealer on the lace to match your skin tone.
Use a blow dryer on a cool setting to help set the adhesive and the makeup on the lace. This step ensures everything is dry and firmly in place.
Wrap a silk scarf or elastic band around your hairline. This pressure helps in further melting the lace into the adhesive, ensuring a seamless blend. Leave it on for about 10 to 15 minutes.
Step 8: Style and Perfect.
Once the lace is fully melted, gently remove the silk scarf. Use the comb and your fingers to style the wig as desired. If there are any areas where the lace is lifting or not fully blended, you can use a small amount of adhesive to touch up.
At last.
Melting the lace on a wig might seem like a daunting task, but with practice, it becomes an easier and faster process. The key to a natural look lies in patience, precision, and the right materials. Remember, the goal is to achieve a hairline that looks as natural as possible, so take your time with each step.
