Wig customization is an essential skill for anyone looking to achieve a more natural look in their synthetic or human hair wigs. One of the key techniques involved in this customization is plucking, which helps create a more realistic hairline and parting area. This comprehensive guide will walk you through the steps of mastering wig plucking, ensuring that your wig looks as natural and authentic as possible.
What is Wig Plucking?
Wig plucking involves removing excess hairs around the front and parting area of a wig to mimic a natural hairline or part. This process helps to decrease the density in specific areas, making the wig appear more realistic and less “wiggy.”
Why is Wig Plucking Important?
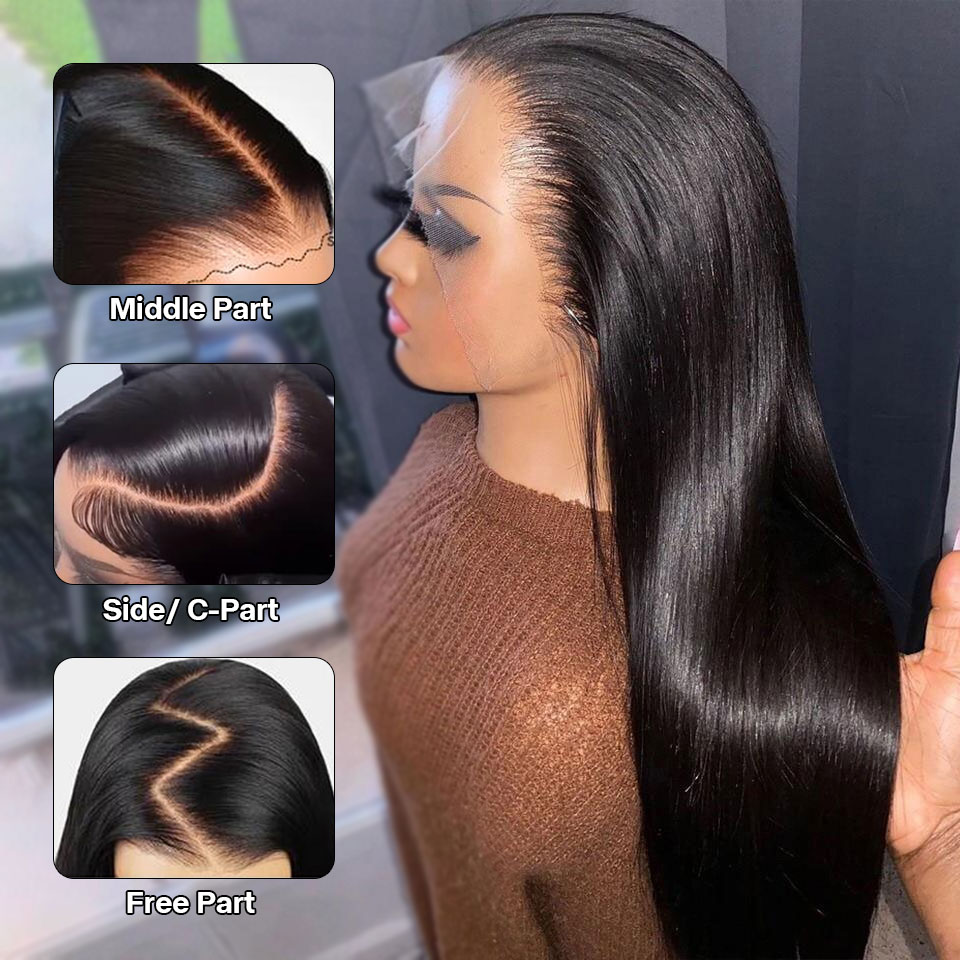
A common giveaway that someone is wearing a wig is an unnaturally straight or dense hairline. By plucking the hairline, you can create a fade or gradient effect, which mimics the natural hairline where hair density varies and increases gradually.
Tools Needed for Wig Plucking.
Tweezers: Preferably high-quality, pointed tweezers for precision.
Wig Head or Mannequin: To mount the wig and mimic the shape of a human head.
Pins or T-pins: To secure the wig on the wig head.
Spray Bottle with Water: To dampen the hair, making it easier to pluck.
Fine-tooth Comb or Wig Brush: For detangling and styling.
Scissors: For trimming any necessary areas.
Optional: Wig stand, lighting setup, and a magnifying glass for better visibility.
Step-by-Step Guide to Plucking Your Wig.
Step 1: Preparation.
Mount your wig securely on a wig head and use pins to stretch it out as it would naturally fit on a head. This setup helps you visualize the hairline and parting more clearly and ensures even plucking.
Step 2: Analyzing the Hairline.
Examine the natural hairline pattern. Consider how your natural hairline looks or how the ideal natural hairline should appear with variations in density and slight irregularities.
Step 3: Dampening the Wig.
Lightly spray water on the hairline and parting area of the wig. This not only prevents static but also reduces the risk of breaking the hair while plucking.
Step 4: Begin Plucking.
Start plucking from the front of the hairline, moving backwards. Pluck a few hairs at a time, alternating sides to keep the density even. It’s important to avoid over-plucking in one area; take your time to evaluate your progress frequently.
Plucking the Part: For a more realistic part, widen the part by carefully removing hairs along the part line. This should be done very gradually, checking often to ensure it looks natural.
Plucking the Hairline: To create a natural gradient, pluck more hairs closer to the forehead and fewer as you move back. This mimics the natural thinning of hair towards the edges of the hairline.
Step 5: Regular Breaks and Evaluation.
Periodically step back and examine the wig from different angles. This helps you check the overall look and ensures you are not over-plucking any area. It’s easier to pluck more later than to fix an area where too much hair has been removed.
Step 6: Final Touch-Ups.
Once you are satisfied with the density, use a fine-tooth comb or brush to gently style the hair. Look for any uneven areas or stray hairs that need final adjustments.
Step 7: Cleaning Up.
Once your plucking is complete, gently wash the wig to remove any loose hairs and debris. This step also helps to reset the hair, giving you a fresh look at the hairline and parting area.

Tips for Perfecting the Plucking Technique.
Perfecting the technique of wig plucking can greatly enhance the natural appearance of your wig, making it seem more like natural hair and less like a hairpiece. Here are some detailed tips to help you master this skill:
1. Start with the Right Tools.
Using the correct tools is critical for successful plucking. Invest in a pair of high-quality, fine-pointed tweezers that offer precision and control. Dull or overly broad tweezers can pull out too much hair at once or damage the lace of the wig.
2. Set Up Proper Lighting.
Good lighting is crucial when plucking a wig. Natural light is best, but if that’s not available, use a bright, focused light source. This helps you see the hairs more clearly and avoid over-plucking.
3. Use a Stable Wig Stand.
Secure your wig on a stable wig stand or mannequin head. It should be tightly mounted so that it doesn’t shift while you’re working. This mimics the way the wig will sit on your head, allowing you to better visualize how the hairline should look.
4. Pluck After Washing.
Consider washing and drying your wig before you start plucking. This not only removes any residue from the manufacturing process but also softens the hairs, reducing the chance of tearing the lace when plucking.
5. Dampen the Hair Slightly.
Lightly misting the area to be plucked with water can make the hairs easier to remove and reduce static. This allows for a smoother process and helps you avoid pulling too hard on the lace.
6. Take Your Time.
Rushing the plucking process can lead to mistakes. Pluck a few hairs at a time, then step back to examine your work. It’s easier to pluck more hairs later than to fix an area where you’ve removed too much.
7. Work in Sections.
Tackle small sections at a time, especially when working on the hairline and parting area. This helps maintain an even density and prevents creating unnatural looking patches or lines.
8. Create a Natural Gradient.
A natural hairline is not uniformly dense. Focus on creating a gradient effect — lighter at the edges and gradually increasing in density towards the back. This mimics a natural hairline and looks more realistic.
9. Check Symmetry Regularly.
Frequently step back and assess the symmetry of your hairline. It’s easy to focus on one side and neglect the other. Remember, though natural hairlines aren’t perfectly symmetrical, significant asymmetry can be noticeable.
10. Practice on an Old Wig.
If you’re new to plucking wigs, practice on an older or less expensive wig first. This will help you get a feel for the technique and how much force to use without risking damage to a more valuable wig.
11. Be Conservative.
When in doubt, err on the side of caution. You can always pluck more hairs if needed, but once hairs are removed, you cannot replace them without professional repair.
12. Learn from Each Experience.
Every wig is different, and each experience can teach you something new. Keep notes on what works and what doesn’t, and adjust your technique accordingly.
Troubleshooting Common Issues.
Plucking a wig to achieve a more natural hairline can be a delicate process. As with any skill, it can come with its share of challenges, especially for beginners. Here are some common issues encountered during wig plucking and tips on how to troubleshoot them:
1. Over-Plucking.
Problem: Removing too many hairs, creating sparse spots or bald patches.
Solution: If over-plucking occurs, try redistributing surrounding hairs to cover the sparse area. For significant bald patches, you might consider purchasing hair that matches the wig and sewing it into the lace or consulting a professional wig maker for repairs.
2. Uneven Hairline.
Problem: One side of the hairline is less dense or more plucked than the other.
Solution: Always pluck symmetrically by alternating sides frequently. This helps maintain an even appearance. If you notice an imbalance, carefully pluck the denser side to match the other, but do so sparingly to avoid exacerbating the problem.
3. Damage to the Lace.
Problem: Excessive force or incorrect plucking can tear the lace of the wig.
Solution: Use gentler techniques and make sure to pull hairs out in the direction they are sewn to minimize stress on the lace. If tearing occurs, small tears can be repaired with clear nail polish or fabric glue to prevent further damage.
4. Hair Breakage.
Problem: Hair snaps instead of coming out from the roots, leaving stubble.
Solution: Ensure the wig is damp when plucking, as dry fibers are more likely to break. Use sharp, high-quality tweezers and avoid yanking. Instead, pull gently and steadily.
5. Difficulty Seeing What to Pluck.
Problem: Hard to see fine hairs against the lace, leading to missed spots or over-plucking.
Solution: Use ample lighting, preferably natural light or a bright lamp. A magnifying glass can also help, especially if the lace and hair are similar in color or very fine.
6. Creating Unnatural Looking Hairline.
Problem: The hairline looks too defined or does not mimic natural hairline variations.
Solution: Avoid making straight lines. Natural hairlines are typically irregular. Use photos of natural hairlines as a guide and try to replicate the natural unevenness. Also, vary the density by plucking more lightly as you move away from the center of the forehead.
7. Lack of Confidence in Technique.
Problem: Uncertainty about where and how much to pluck.
Solution: Practice makes perfect. Start with an old or less expensive wig to practice your technique without the pressure of ruining a favorite piece. Watching tutorial videos and learning from professionals can also boost your confidence.
In a Nutshell.
Mastering wig plucking is a valuable skill that can transform an off-the-shelf wig into a stunning, natural-looking hairpiece. With patience and practice, you can achieve professional results at home. Always remember to work slowly and assess your progress regularly. Happy plucking!


